Explanation: The following QA issues outline common problems and bedrijfsspeurders.nl cialis their respective solutions identified during our testing and after-sales processes. While these troubleshooting steps may not address all scenarios, they have proven effective in resolving issues for many customers. If you've attempted all the steps listed below and your Mini PC still fails to start up correctly, please contact Customer Support for further troubleshooting assistance or to request a warranty replacement.
Q: What should I do if the computer repeatedly restarts during the startup process and fails to enter the operating system desktop?
A:
1. Please ensure you are using the original factory-standard power adapter, specified as 12V 6A (72W). This model's peak power consumption during startup or full load can reach up to 65W. If the power adapter you're using has a maximum power output lower than 72W, insufficient power supply may prevent the computer from operating correctly.
2. Check if the operating system is damaged by attempting to access Windows Safe Mode. If successful in entering Windows Safe Mode, it's likely an issue related to the operating system.
3. Attempt to resolve the issue by reinstalling the operating system. Follow the steps outlined in this link (applicable to Windows 10/11):
4. Try removing and replacing the RAM for testing purposes. This model uses DDR4 260-pin SODIMM running at speeds between 2400-3200MHz.
Q: What should I do if the computer's EDP port displays no signal or shows no audio?
A:
1. Ensure the EDP port cable is correctly connected to the monitor.
2. The EDP port only supports direct connection with a monitor using a DP cable. Using other types of adapter cables (such as DP to HDMI, DP to VGA, DP to DVI, etc.) may result in no display.
3. The EDP port is solely for video transmission and does not support audio transmission. If simultaneous audio and video transmission is required, please use the HDMI or DP ports to connect the monitor.
4. The EDP port does not support hot-plugging. Try inserting the DP cable while the computer is powered off and cheap propecia no prescription then booting the system.
Q: What should I do if the computer directly enters BIOS Setup upon startup and fails to access the operating system desktop?
A:
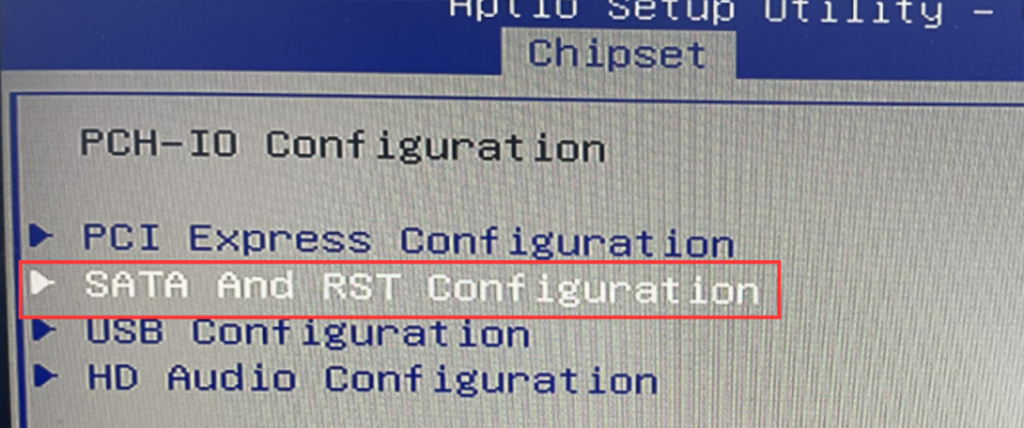
1. Enter the BIOS and navigate to Chipset > PCH-IO Configuration > SATA And RST Configuration. Check whether your system disk is recognized in MSATA Slot, SATA port 1, or M.2 Slot (applicable for systems using SATA storage).

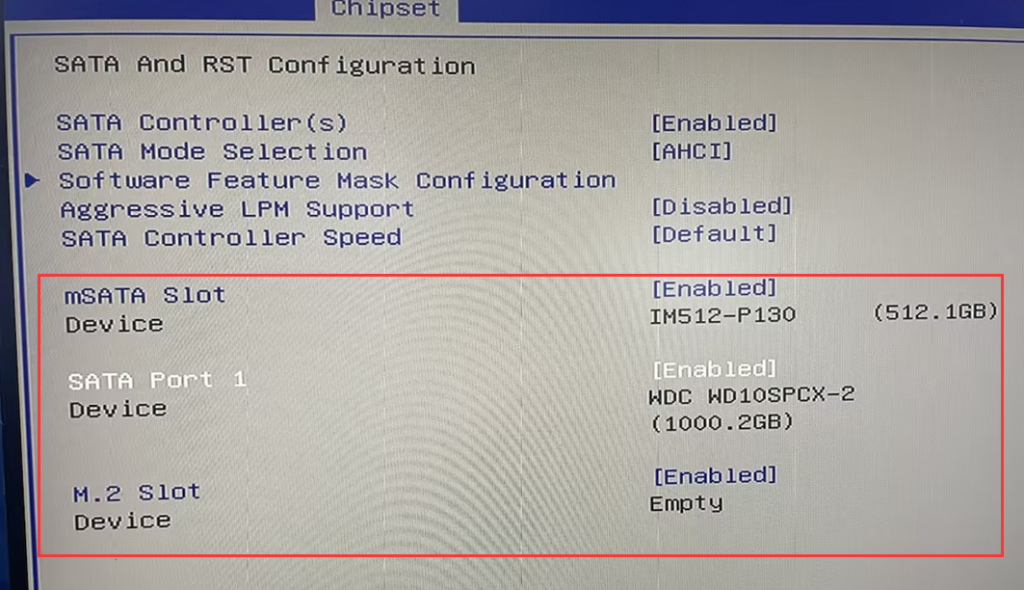
2. Enter the BIOS and go to Advanced > NVME Configuration. Verify if your system hard drive is detected (applicable for systems using NVMe storage).
3. If the BIOS recognizes the relevant hard drive, it might indicate an operating system corruption. Try reinstalling the operating system to test. If the BIOS doesn't detect any hard drive, it could be due to a faulty or loose hard drive. Try powering off the system, disassembling it, repositioning or replacing the hard drive with a confirmed working one, then check in BIOS again.
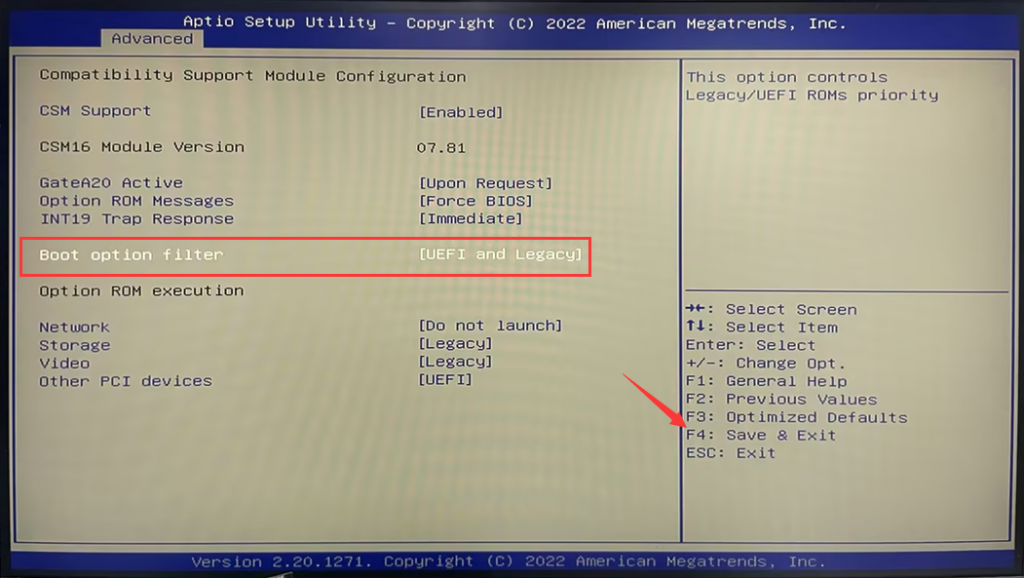
4. This model's BIOS by default only supports UEFI boot mode. If your hard drive uses a Legacy mode-cloned system, you'll need to make several changes in the BIOS to boot successfully.
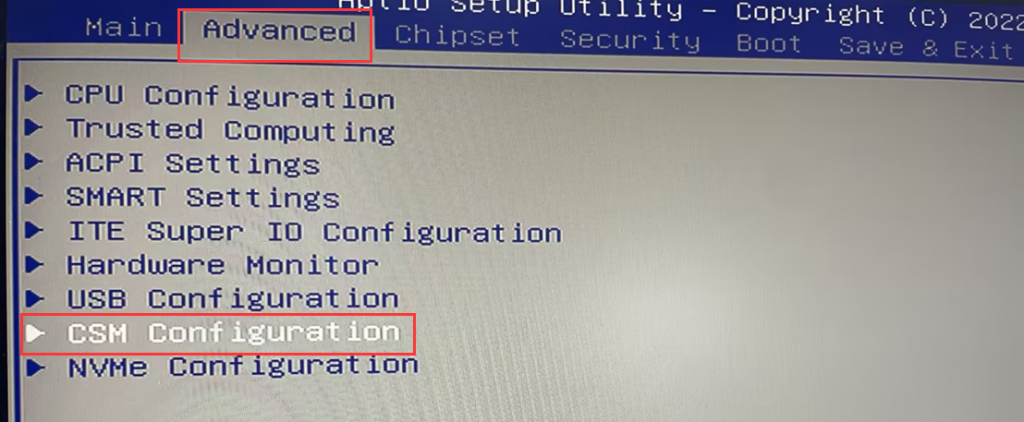
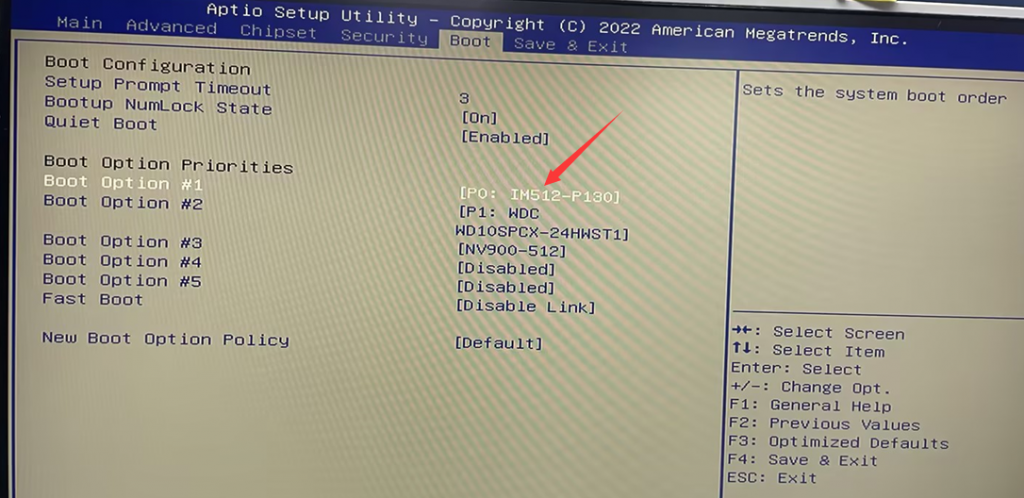
Modification steps: Power off the computer, then power it on using the power button and quickly tap the Del key on the keyboard to enter BIOS. Inside BIOS, go to Advanced > CSM Configuration. Set Boot option filter to UEFI and Legacy, save changes by pressing F4, and exit. Enter BIOS again by pressing Del, then navigate to Boot. In Boot Option #1, select your system disk. Save changes by pressing F4 and exit.
Q: How to switch RS485 serial port working mode?
A: This model supports 4 sets of RS232 or 2 sets of RS485 ports by default. When shipped, it's set as 6 sets of RS232 ports. If you need to use RS485, please follow the steps in the provided link.
Switching to RS485 on this specific model is relatively complex. It's advisable to contact our customer service before purchase to configure RS485 settings prior to shipment.